Creating a GIMP plugin for TempleOS' .GRA files
UPDATE: 14/12/2018
I wrote this post in 2015, but never properly published it, along with this website. Since writing the post I discovered that Terry Davis has sadly passed away. I decided that it would be worth publishing my experience of interacting with him. I've tried to be as respectful as possible with regards to his mental illness. I've also updated the links to this website to use archived ones, as they are now dead.
Creating a GIMP plugin for TempleOS' .GRA files
A few years ago I came across TempleOS, an operating system created over 12 years by a man called Terry Davis. At first glance it looked quite complicated and daunting, perhaps even a bit primitive. A closer look revealed that Terry had put quite a lot of thought into creating his ideal operating system. His forum posts and documentation showed that he knows quite a lot about the inner workings of computers, more than I could hope to understand. He even created his own programming language, a dialect of C, and implemented his file formats and compression system.
One thing that also becomes apparent from briefly looking at his website - the man is schizophrenic. Terry believes that his operating system is "God's official temple", of which he is the high priest. His charter compares his operating system to Solomon's temple, a "special place for meditation, to do offerings, a community center, a home to God's beauty, that encouraged love of God". A lot of the limitations of TempleOS are in place as a result of "commandments" of sort from God. The resolution is permanently set at 640x480, and there are only 16 colors. There is no networking functionality, there is a 100 000 line-limit on the codebase, and there is no permission system - everything happens in kernel mode. There is full access to all of the hardware, and no encryption. It seems to espouse some of the "hacker" values that came about in the 60s era of computing - a sort of playground of sorts, aimed to allow the user to explore their hardware whilst applying limitations to keep things simple.
On Terry's website is a list of "demands", a wishlist of sorts aimed at third-parties in order to facilitate the running of his operating system. They range from hardware demands (hardware reset switches mandatory on desktop computers) to software demands (removing secure-boot in Microsoft Windows). Most of these seem unlikely to be fulfilled, but one of them caught my eye:
Windows' Paint and Linux's Gimp must support TempleOS .GRA graphics files. GRA Files are much cleaner than BMP files.
Whilst there wasn't much I could do about Windows' closed source Paint program, I knew GIMP was open-source and had a plugin system. I'd always wanted to take a closer look at TempleOS, but found it a little bit daunting, and even though I had no idea how to write a GIMP plugin, this seemed doable. I was interested to get an idea of how his HolyC programming language worked - you can learn a lot about someone by looking at how they code. It'd be a good learning experience about some of the internals of GIMP as well.
So I set off to make myself a plugin!
How do you make a GIMP plugin?
The first thing I did was to try and find out how GIMP interacts with .BMP files. I decided to clone the GIMP git repository and search for any .bmp code. Turns out the .BMP handling code is implemented as a plugin. In fact, a lot of GIMP's seemingly core functionality is implemented as plugins, in particular support for reading and writing files. It was nice to see all the .BMP-handling functionality in one place, and only in a few files:
~/.../gimp/plugins/file-bmp $ wc -l *
 273 bmp.c
  80 bmp.h
 964 bmp-read.c
1037 bmp-write.c
  50 Makefile.am
2404 total
2404 lines isn't too bad, and according to Terry his .GRA file format is even simpler than .BMP, so this shouldn't be too difficult.
I decided to use this bmp-handling code as a starting point, but at this point I still didn't really know how to write plugins!
Being an open-source project there was plenty of documentation to help with creating a plugin. It looked like they were basically just miniature stand-alone C programs, with some libraries to help hook into GIMP functionality, such as grabbing images and layers from the current workspace. The tutorial was quite helpful - I needed a program called "gimptool" which would compile the plugin and optionally install it for you. I was developing this on Linux Mint, so installing this was as easy as sudo apt-get install libgimp2.0-dev. The "hello world" tutorial was quite useful, but only covered a simple plugin with just one C file. The BMP plugin comprised of multiple .c and .h files, with a Makefile.in that was supposedly for use with automake, and I couldn't work out how to generate a makefile from that!
I decided to try and compile all of GIMP to try and generate this Makefile. After wrangling with some dependencies I was able to get a Makefile generated for the bmp plugin. At first I tried dropping this into my standalone plugin, but got an error saying undefined reference to 'gimp_drawable_get_format'. It looked like it wasn't linking the libraries properly. So instead I used make -n on the original plugin to spit out the gcc commands it's using, and then I shoved those into a shell script. They were still quite complicated, seemingly linking in more libraries than necessary, but I find it's better to do whatever it takes to get it working at first, then clean it up later. I called this the "kitchen sink" approach.
Eventually I was able to get this compiling with some complicated gcc commands, and I produced a binary which I was able to install with gimptool. However, I couldn't see the plugin at all in GIMP. Turns out I'd compiled the original BMP plugin agains the bleeding-edge version of GIMP, which appeared to have transition to using GEGL for a lot of its calls, or something like that. So I rolled back the version of GIMP to 2.8.10, generated a new Makefile and then used its commands to compile the plugin, and finally it worked.
At this point it created the plugin using a hacked up shell script, so I removed a whole bunch of dependencies and created a Makefile. It's nothing overly complicated but it made my workflow a lot easier, and should make installation a lot easier for anyone that wants to use the plugin.
With a basic plugin put in place I had something to work from. Now to look at the .GRA file format!
Reading .GRA files
I figured the best place to learn about this was the source for TempleOS itself. Terry hadn't put this on source control, but it was all available on his website. I used a recursive wget call to pull down all the files from his website like so:
wget -r -k -l 50 http://www.templeos.org/Wb/
Not sure if this is the most efficient way to do this (it took about 20 minutes to download roughly half a gigabyte of data) but at least I had all the source. I then tried to find some .GRA files:
$ find . | grep GRA
./Wb/Doc/GRAFiles.html
./Wb/Doc/GRAFiles.TXT.Z
./Wb/Home/Wb2/Files/Pilgrims/NewEngland.GRA.Z
./Wb/Demo/Games/Stadium/StadiumBG.GRA.Z
...that's it? Really?
The most useful of these was GRAFiles.html, which described the GRA file format pretty comprehensively. The format was written in HolyC, which was actually fairly similar to C. One of the cool thing about it was that the primitive types was that it showed how many bits each one was comprised of. Useful!
I then tried to read the bytes of NewEngland.GRA.Z to see how it corresponded with the description. Unfortunately, this wasn't a straight .GRA file yet, this was a .Z file. It'd been compressed. Reading Tips.html revealed the following:
Filenames ending in ".Z" will be automatically compressed and uncompressed when read or written. The compression method is not supported by other operating systems. You can store files uncompressed by Move()ing them to a filename not ending in ".Z". See ::/Doc/TOSZ.TXT if you want to uncompress while in Linux.
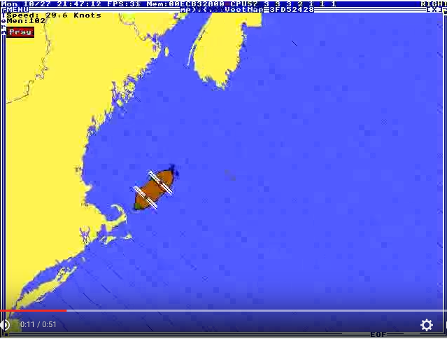
I eventually found TOSZ.CPP in a directory called Linux. I compiled this and ran it on a txt file first to check it worked, which it did. I then tried running this on NewEngland.GRA.Z and it worked, I think. Based on where the image was located, I guessed it was supposed to look something like the image on the left. Here's what the first few lines of the hexdump looked like:
0000000: f303 0000 f803 0000 9305 0000 0100 0000  ................
0000010: 2738 0000 0000 0000 681f 1600 0000 0000  '8......h.......
0000020: 0201 8081 8283 8485 8687 8100 8a8b 8c8d  ................
Comparing it to the BMP format it was definitely a lot simpler:
-
The first four bytes determine the width. The hexdump shows that the values are little-endian (i.e. the least significant bytes are stored first). So this corresponds to 0.03f3, or 1011.
-
The next four bytes are the "width_internal", which is just the width rounded up to the nearest multiple of 8 (0x03f8, or 1016). I guess this is used by the rendering in TempleOS at some point.
-
The next four bytes are the height (0x0593, or 1427).
-
Next four bytes are flags. In this case, it's just "1", meaning compression is enabled. I wasn't sure at this point whether this still applies since I'd already uncompressed the file once before.
-
If the file used a custom palette, it would appear here, but this flag wasn't set, so I guessed the remainder of the file was just the body.
Normally each byte would represent a pixel, with the first four bits representing transparency and the next four representing the colour, but the bytes don't seem to reflect that. They seem to vary a bit more than expected - the image in the Pilgrims game it comes from looks like it's just 1 or 2 major colours. Looking a bit closer, there is a little bit of a pattern: a lot of the bytes started with "8", "9" or "a", but it still didn't look like it was representing any consistent colours.
Maybe this body had been compressed again? Terry mentions in one of the comments that he's using LWZ compression. I take a look on wikipedia and find a decent youtube video that explains the process. Pretty cool to learn about, but it didn't really help us too much, except for the fact that there is a Linux tool called "uncompress" that implements this form of compression. Maybe I could use this to uncompress the rest of the data?
I needed some sort of hex editor. I found one called "bvi", and being a fan of VIM I installed it instantly. I removed the header bytes and ran it through uncompress, but it just crapped out.
At this point I was stuck for ideas, so I decided to ask Terry for some help. I won't paste the entire exchange here - it's quite long, but he was more than happy to help:
Oh, that You!  God bless you!

Yeah, it is compressed again.  I attached the LZW uncompress code.
Just run the body through the uncompression again.

Do you think that is a bad idea to have it compressed twice? Maybe, you are right.
I wish we had a committee from ACM or NASA.  Is there a Linux committee?

Currently, the Linux files system does not support my compression.  For convenience,
if you already add the file system decompression, it should not be too much trouble
to run it again?

You make me sad and undecided.
Use TOSZ.CPP again! Why didn't I think of that? I did this straight away and the result was the following:
0000000: 0101 0101 0101 0101 0101 0101 0101 0101  ................
0000010: 0101 0101 0101 0101 0101 0101 0101 0101  ................
0000020: 0101 0101 0101 0101 0101 0101 0101 0101  ................
0000030: 0000 0000 0000 0000 0000 0000 0000 0000  ................
0000040: 0000 0000 0001 0100 0000 0000 0000 0000  ................
0000050: 0001 0101 0101 0101 0101 0101 0101 0101  ................
0000060: 0101 0101 0101 0101 0101 0101 0101 0101  ................
0000070: 0101 0101 0101 0101 0101 0101 0101 0101  ................
0000080: 0101 0101 0101 0101 0101 0101 0101 0101  ................
0000090: 0101 0101 0101 0101 0101 0101 0101 0101  ................
That made a bit more sense! 0 and 1 correspond to black and blue, and I was expecting yellow, but this could still work. I'm not sure how Terry's implementation differs from the "official" implementation, but that's ok. Next step would be to create a C program that can read the file and put it in an appropriate data structure, probably just a byte array, or whatever GIMP will accept.
To do this I needed to transpose TOSZ.cpp to C. This turned out to be pretty easy. The only thing that was C++ specific was the use of classes, but they were just holding data so I just changed them to structs. The code was defined to input and output files, but it was easy enough to change this to use byte arrays. It seemed to do the decompression well enough. I actually had a go at printing the values to the screen in 1427 rows of 1011 digits each. Here's how it looked:
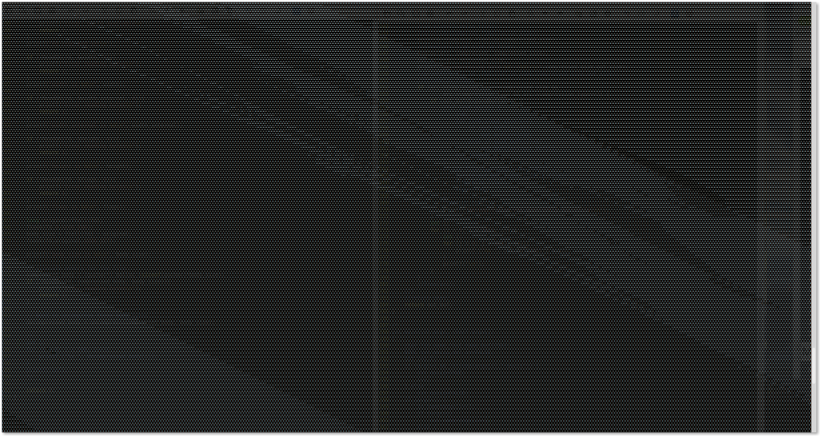
I wasn't sure this was entirely correct, but it definitely didn't look random. And as you'll see later it actually somewhat resembled the the actual image. Heh, it would've looked pretty cool if I colourised the output...
A strange issue appears!
I then ran into an issue that took me a long time to fix. I was able to access the uncompressed byte array just fine within TOSZ.c, but when I tried to access the array in my external program I got a segmentation fault. It seemed to really only happen if the byte array I created was particularly big. Smaller arrays had no problem. It obviously smelled like some sort of memory allocation problem, but I was mallocing the array just fine. It seemed like returning from the function deallocated the memory somehow.
I divided the code until I found the smallest bit of code that reproduced the crash (much like Dave Baggett did for his Crash Bandicoot bug). Strangely, if I removed the include for "gra.h" it would work fine. I tried stepping through the code in gdb, and although I could reproduce the issue it didn't gleam any new information. I tried running it through valgrind but it returned no issues. The documentation said that memory issues may not be reproducible in valgrind because of how it runs, which I guess made sense, but still didn't help my problem!
After a few hours of bashing my head against the wall, I realised that the header file I created for the LZW uncompression used the same preprocessor flag as gra.h (#ifdef GRA_H), so the function prototypes I had in that file weren't being included. I found it strange that it compiled at all then! I did get the following two warnings though:
read.c:83:5: warning: implicit declaration of function ‘uncompress’ [-Wimplicit-function-declaration]
    decompressed_body = uncompress(compressed_body, body_size);
    ^
read.c:83:23: warning: assignment makes pointer from integer without a cast [enabled by default]
    decompressed_body = uncompress(compressed_body, body_size);
I guess it looks at what's been compiled and picks what's most suitable. In my case, it looks like the right function was being called, but any memory allocated within that function call is freed when the function returns. It wasn't immediately obvious to me that that would happen, and I wasn't quite sure what to search for to help me understand this behaviour. I do want to investigate this further.
Anyway, changing the preprocessor directives in TOSZ.h was an easy enough fix, and I was back in business. Next thing to do was to look at how to turn this byte array into something GIMP could read and understand. I looked at the BMP reading code, and while it was insightful, it was also way more complicated than the .GRA reading code ended up being. In fact, once I had the uncompressed byte-array, all I had to do was make a few calls to the GIMP library to create a layer and its containing image, set a filename, create a region of pixels and then set that region with the same byte array. I also needed to include a colourmap to map the byte values to RGB colours.
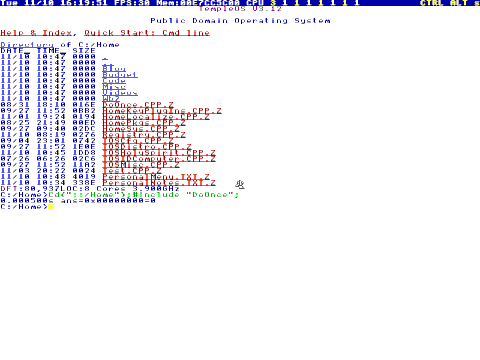
I compiled this and tried opening up a .gra file, and I got this:

Holy crap it worked! Although, it wasn't really what I was expecting. The video implied that I'd be seeing lots more yellow.
I tried using the other GRA file I found, Stadium.GRA, but I got an error when trying to uncompress that one, so I didn't really have anything else to go by. I decided to show Terry where I'd gotten so far and ask for more .GRA files to test with. He replied:
Yeah, it is blue and black. Sorry for not telling you.
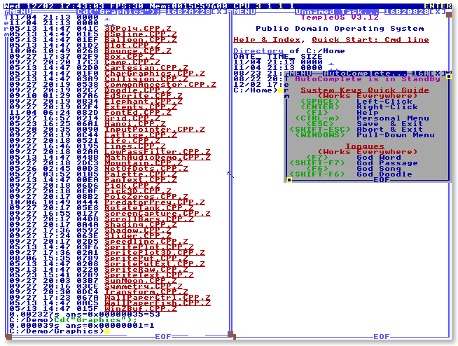
>Type("NewEngland.GRA");
It will show the image at the command-line.
You can right clikc or press <ENTER> on a directory listing and Type() a file.
I'm excited to have that version of GIMP! Will it be pushed into the standard GIMP and will my Ubuntu software update bring it to me, eventually? Maybe, I need to apt-get it or something?
The times I would actually use it are when I have an image from the Web and I want to import it into TempleOS.
I run Linux, by the way. I used to run Windows a couple years ago. I have GIMP installed.
Recently GIMP got rid of 16 color Windows BMP files. That sucked. I made my own tool to convert a 24-bit Windows BMP file to 16 color.
16 color is depressing, a little, when you are brutally reminded by converting a photo. LOL
16 color is the only format we want, however... forever. God said so.
I am so happy you did that.
I was pretty pleased that he was happy with what I was doing. So many warm fuzzies! I took his test file and imported it. Looked perfect!
The reading logic was almost complete. I added the logic for reading the compression flag, and I considered doing the custom palette logic, but I wasn't sure it would ever be used if the OS can only display those 16 colours anyway.
Exporting .GRA files
I decided to make a start on the .GRA writing code. If I can get all this working I might be able to seend a preliminary build to Terry to get him to try it out himself. Looking at the .bmp file writing code, it looked pretty much like I'd be doing the same as the reading code, but in reverse...not sure what I expected! I decided to start writing it from scratch, rather than modifying the .bmp code, since again, that code was quite complicated for what we needed.
I started off using calls to the GIMP library to get the image itself, and then extracting the array of bytes. At first I wasn't sure how the byte array was encoded. This is what it looked like:
01ff 0fff 0fff 0fff 0fff 0fff 0fff 01ff
01ff 01ff 01ff 01ff 01ff 01ff 01ff 01ff
01ff 01ff 01ff 01ff 01ff 01ff 01ff 01ff
01ff 01ff 01ff 01ff 01ff 01ff 01ff 01ff
01ff 01ff 01ff 0fff 0fff 01ff 01ff 01ff
01ff 01ff 01ff 0fff 0fff 01ff 01ff 01ff
01ff 01ff 01ff 01ff 01ff 01ff 01ff 01ff
According to the docs it looked like it should be encoded as 1 byte per pixel. Then I remembered I'd added an alpha channel whilst playing around with it. So each pixel was represented by two bytes: the first being the colour index and the second being the opacity. With this information it was easy to create a file with the data uncompressed. I compared it the original uncompressed body and there was no difference. Success!
Next step was to work on the compression. There was no compression code in the TOSZ program, but Terry sent through Compress.CPP, which was actually written HolyC. So I translated it to C and added the code into the existing TOSZ.c file. This was fairly easy: a lot of the calls were the same, but with capitalised first letters (Free instead of free, for example). Some of the code in Compress.CPP was already in TOSZ.c.
There was one function, however, that was actually implemented in assembly: BFieldOrU32. According to the code comments, it "OR"s the U32 (integer) into the bitfield, but I wasn't too sure of the specifics. At this point I thought of asking for Terry's help, but I instead I rolled up my sleeves and looked at the assembly. I'd looked at 6502 assembly before, how hard could x86 assembly be?
Turns out, not that hard! Here's a breakdown of the assembly:
    PUSH    RBP
    MOV     RBP,RSP                 ; Some stack pointer setup stuff
    MOV     RBX,U64 SF_ARG2[RBP]    ; POS in RBX
    SHR     RBX,3                   ; SHIFT POS to the right 3 times (to get byte in array)
    ADD     RBX,U64 SF_ARG1[RBP]    ; ADD the byte pointer(arg1) to RBX (to get the correct byte in the array)
    MOV     RAX,U64 SF_ARG3[RBP]    ; Move the basecode(arg3) to RAX
    MOV     RCX,U64 SF_ARG2[RBP]    ; Move the POS to RCX
    AND     CL,7                    ; AND CL with 7 (the last 8 bits of RCX)
    SHL     RAX,CL                  ; Shift RAX CL bits to the left (so the basecode is ORed from the correct bit)
    OR      U64 [RBX],RAX           ; OR RAX with RBX, and I think the result is stored in RBX
    POP     RBP
    RET1    24                      ; Some teardown stuff. It's a void function so we don't need to return anything
Looks like I can understand this, but will I be able to translate it to C?
Yep.
void BFieldOrU32(BYTE * bit_field, long bit_num, DWORD pattern){
    bit_field += bit_num >> 3; // Increment bit_field pointer by bit_num/8
    pattern <<= bit_num & 7; // Shift pattern bit_num % 8 to the left
    *bit_field |= pattern; // OR the pattern on the bit_field.
}
Just three lines! Could it really be that simple? I tested it out and it worked...to a point, and then the rest of the output was all different.
I exported a .GRA file and compared it to the original file using xda. Looks like it's failing on this line:
00000a0: 8ffe 292b e52f 14b1 8003 fb7d 6a07 5060  ..)+./.....}j.P`
00000a0: 8ffe 2828 e020 0080 0003 fa7c 6800 4040  ..((. .....|h.@@
I stepped through the code and eventually found the problem: I was only ORing the last byte of the integer, instead of all 4 bytes. My fix was to cast the byte as an integer to make sure the whole integer was being ORed. I changed the last line to look like the following:
*(DWORD *)bit_field |= pattern; // OR the pattern on the bit_field.
and it works! Doing a diff on my .GRA and the original yields no changes. Looks like my plugin can do a successful round trip!
Cleaning it up.
I discovered a bit later that there was a plug-in template available that comes with all the autoconf/automake stuff to help integrate the code with the framework. I had a go at shoving my plugin into the template, but there were way too many places that I needed to change the code, and I coudln't get it to work in the end, so I stuck with my simpler Makefile. Hopefully it'll be portable enough...
Terry had mentioned that he'd like to be able to get images from the internet and save them as .GRA files. To do this, I would need to make sure the GIMP project was in indexed mode with 16 colours, specifically THE 16 colours specified in TempleOS. I tried to see if I could convert an image to use the colour palette. There was a method, but it requires the palette to be installed, since it gets addressed by name.
What if I installed the palette as part of the plugin installation? It wouldn't be that hard - once I created a palette file I could just copy it to the user's palette directory as part of the "make install" process. I'm pretty sure this is all the gimptool does when it installs a binary plugin anyway.
I found out how to create a palette file - it was pretty simple really:
$ cat TempleOS.gpl
GIMP Palette
Name: TempleOS GRA Colors
#
#       A map of the colors used in TempleOS .GRA files
#
#
  0   0   0
  0   0 170
  0 170   0
  0 170 170
170   0   0
170   0 170
170  85   0
170 170 170
 85  85  85
 85  85 255
 85 255  85
 85 255 255
255  85  85
255  85 255
255 255  85
255 255 255
When importing a .GRA file, my code sets the above palette as well. The user could also set this palette manually.
I also implemented transparency, although GIMP only supports 1-bit opacity (either fully opaque or fully transparent), even though it uses one whole byte to indicate opacity. Also, the scale was the opposite, so FF in GIMP means it's fully opaque, but this would translate to 0 in TempleOS to represent 0 transparency.
I cleaned up the code and sent it to Terry to try out, along with a few instructions, but he found it a bit too complicated...
That's to hard to use -- all the index stuff.
It's worthless.  This is supposed to be for stupid people.
It's too hard to use.  can't you automatically pick the standard color map?
...which was fair enough! I decided to add a dialog which appears if you try and save a .GRA image that's not indexed with the correct 16 colors, and by clicking "Export" on this dialog it would automatically convert the image. This conversion was as easy as making one GIMP call, although converting images that were already indexed with the wrong colourmap, it converts it first to RGB and THEN back to indexed with the correct colourmap. Seems like a hacky workaround, but it makes sure that the colours are as accurate as possible.
Finished!
I put this on github and sent this to Terry and his was response was fairly minimal, but appreciative:
I would like the standard GIMP to support GRA format for export.
Until the world discovers my SETI antenna, nobody is using TempleOS let alone moving files in and out.
I thought of listing you as a 3rd party sight. I can list a github or something.  It would be nice if it were part of GIMP.
When the world discovers my talking SETI antenna, then your work will be used and appreciated.  Until them, nobody is using it.
But that's ok, I was doing this more for myself anyway. It was nice to work on something so low-level...looking directly at the data at a binary level and manipulating bits. It was also great to gain some understanding about a common image format. I'm curious now about how other image formats are implemented, in particular JPEG, PNG and GIF. It's great when you find out what's inside a black box, and you find it's not so complicated or mysterious as you thought. It required a lot of concentration at times, and it'd been a while since I'd acheived that flow state.
In the end, I'm not sure how useful this plugin would be. Terry wants it built into standard GIMP, but I think it's pretty unlikely that this would happen. That said, it was a pretty fun challenge. It was also interesting to get a glimpse into Terry's OS. Whilst I barely scratched the service, my impression was that it was very much a custom-made operating system, made exactly how Terry likes it. Terry found .BMP files too difficult to navigate, so he got rid of them and made up his own format. He also wanted to work a little closer to the metal, so he wrote parts in assembly and named primitive types after how many bytes they took up. He turned his shell into a JIT HolyC compiler, with commands essentially implemented as function calls, and programs ran by "including" them into the running shell. He even let it print out sprite graphics inline. There are lots of cool ideas in his OS, more than I could probably appreciate.
If you're interested in learning a bit more about the OS, I can recommend Richard Mitton's blog post for a bit more insight.